Fun With Textures
- Barry Mountford
- Oct 20, 2019
- 4 min read

Hey guys! I have been asked quite a few times about my textured backgrounds I use in my portraits and where I buy them, well truth is I make them! and I am going to show you how and explain why I use them.
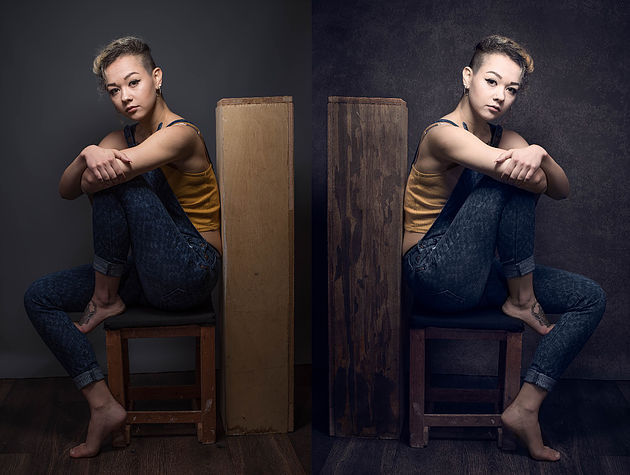
As you can tell from my portfolio and mainly my creative portraits section I produce a lot of composite portraits, I have used this technique for the past 5 years combining studio portraits with background images which allows me loads of creative freedom, I have used textures in my creative portraits to add depth and interest to many of my images. Now its only probably the last couple of years where I have started to incorporate the textures in my studio portraits which again adds depth and interest and also allows me to produce a look which I can call my own. There are many ways to add texture to your backgrounds by casting shadows on them, painting them, buying a painted backdrop or you can add them in photoshop. PHOTOSHOP! I hear you say.......... ITS COOL AND ITS OK TO DO ! so don't get hung up on all the bad hype about photoshop and how you shouldn't manipulate photos, the truth is if you like to create images this way then thats absolutely 100% ok WHY because there is no right or wrong way just YOUR way so release the shackles and get creative!
You will find me shooting walls, floors, skies, fences, fabric absolutely anything interesting enough to produce nice textures, once I have these on my drive I then open each individual image in photoshop and literally play about with them, desaturate, blur parts, lighten parts, darken, add a colour overlay, sometimes adding another texture on top of that and change the opacity to create a really unique looking texture, the possibilities are endless and it's fun and a great way to find new ways to create in Photoshop! I have added a FREE texture pack which you can download from my website here 21 FREE TEXTURE PACK so if you haven't created any of your own or just want to try this out head over and download them now and have fun.

So onto the technique, now for best results it is better to shoot on a 50% grey backdrop this allows easier blending in Photoshop. Now to achieve the 50% grey you can just shoot on a white backdrop and simply move your subject and lights away from the backdrop which intern will give you a grey backdrop and it will become darker grey going to black the further away you move your lights and subject and lighter the closer you get to the backdrop, or you can buy a 50% grey backdrop and light it accordingly but it is just as easy to do on white. So you have the choice for the desired colour of grey you want, REMEMBER there is no right or wrong! This is just the way I choose to shoot. Once you have chosen your image to have a textured background added to it, open it up in photoshop, also open your texture, if you haven't created your own textures simply use the free 21 TEXTURE PACK , once you have learned the technique then you can create your own.

With both images opened in Photoshop we now need to drag our texture image onto of our portrait and we do this by selecting the move tool then clicking and dragging the texture image into the portrait window.


Now we have both images to work on in the layers palette make sure the texture layer is highlighted and resize the texture so it covers all of the portrait image, then click the tick to confirm size. Here's where the magic happens, open up the blending menu here in our layers palette.

Scroll down to the blending option overlay or soft light, now this is your choice depending on which look you prefer you can always use the opacity slider to reduce the strength of the texture to suit your style. OH NO ITS RUINED MY IMAGE! ....... wait no this is part of the process!


From here we now need to add a layer mask to our texture layer (layer 1) and we do this by clicking on the layer mask icon at the bottom of the palette here. This will create our layer mask which will allow us to paint away (hide) the texture effect off the areas of our image where we don't want it.
You will now see a white box sitting beside your texture layer, this is our layer mask.

Next step we need to select our paint brush and set the palette colour to black, now making sure the layer mask is highlighted we can now paint away the texture from the image where we don't want to see it.

Wow! Instantly you can see how the texture is looking on our background, from here you can paint away the texture from the box and floor.

We will now repeat the same process as above only this time we are adding a different texture to the box to give it a nice grain.
Select your move tool, drag the new texture on top of the subject and position it.

Now select your blending option OVERLAY, then create our layer mask for the wood texture and paint away the texture where you don't need it.
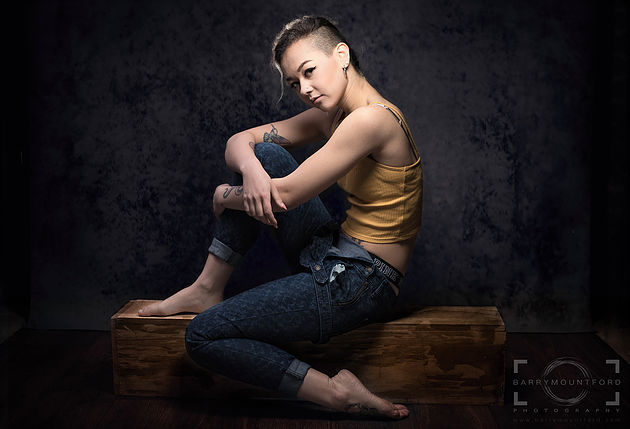
And thats it! simple and very effective. Give it a go and have fun. Below are a few samples of textures added to my portraits.


Comments